Clear Western Red Cedar Building Materials Used for Custom Fence

Grown only in the Pacific Northwest, Thuja plicata, commonly referred to as Western Red Cedar, is the ultimate building material for outdoor applications due to its natural durability and workability.  It is resistant to rot, decay, and insect attacks.  This means that anything built with it will last longer and require less maintenance.  Aesthetically, there is no parallel for the natural beauty of Western Red Cedar.

Western Red Cedar is available in different grades, including the one that is just right for your project.  From casual knotty grades to clear grades, each offers its own unique style to help you achieve the architectural element you desire.

When a motivated homeowner in California contacted us about supplying him with Western Red Cedar for a fence he wanted to build, he also provided us with pictures he found on Pinterest.  This helped us determine what grade and dimension of Western Red Cedar he was interested in using for his custom fence.

With his handy work, and our high quality, clear Western Red Cedar, he was able to create an amazing feature on his property that will last for many, many years!

“Michele – G’Morning. I wanted to thank you for all you did and for providing the Cedar Lumber. I wanted to send you a couple of pictures of the end result, it turned out amazing” – Rick

custom gate constructed from clear Western Red Cedar lumber

custom fence made from clear western red cedar lumber

When specifying materials for your next project, don’t be disappointed, insist on Western Red Cedar, the Cedar that is grown in our back yard!  Even with shipping (in most instances), the pricing is comparable to your local lumberyard, with the quality and supply much better.

360.757.6343

950 B Fountain Street, Burlington WA

www.CedarCountryLumber.com

We ship nationwide!

Western Red Cedar Garden Bed Material

Now that the weather has turned, it is time to start thinking about putting in (or adding to) a backyard garden, and raised beds are one of the easiest to ways to get started.  For a whole list of the benefits of raised garden beds, please see our post on that subject by clicking HERE.

Limited to stock on hand, our 2×12″ utility-grade Western Red Cedar is the ultimate choice for constructing new beds.  Naturally resistant to rot and decay, easy to work with, and beautiful!

PRO TIP:  If you plan on growing carrots or any other root vegetables, your raised garden beds need to be at the very least 10″ deep.

Our value priced 2x12" cedar boards are perfect to raised garden beds

Western Red Cedar raised garden beds should be at least 10" deep

Western Red Cedar Raised Bed Garden

Due to exceptional pricing, our utility-grade “value-priced” Western Red Cedar garden material is sold as-is with no returns or exchanges.  Limited to lengths and stock on hand.

Before your next project, be sure to visit us!  We ship nationwide!

360.757.6343

950 B Fountain Street, Burlington WA

www.CedarCountryLumber.com

Western Red Cedar Split Rail Fencing

One of the oldest types of fencing, split railing fencing made from high-quality Western Red Cedar, is a popular and economical choice for defining property lines and other outdoor spaces and adding rustic beauty to the landscape.  Due to Western Red Cedar’s natural properties that resist rot and decay, as well as insect attack, Western Red Cedar split rail fences will last for many years with no maintenance.

Our Western Red Cedar split rail posts and rails are all individually split, peeled, and formed to expose the cedar’s natural color and grain.  Our split rail posts are pre-drilled for use as an end, corner, or line with either two or three holes to accommodate the rails.  Two rail posts will yield a fence with a finished height of roughly three feet, while the three rail post system provides a finished fence height of approximately four feet.

Split rail fencing end posts are drilled halfway through and are used as starting and stopping points in the fence.  Line posts are drilled all the way through to support rails on either side, while corner posts are drilled halfway through on adjoining sides to create right angles.

Western Red Cedar Split Rail Fence

Cedar split rails can be used in conjunction with either the two rail or three rail system and have a tenon on each end to slide into the split rail post.

Western Red Cedar Split Rail Fence tenon end

If needed, in addition to “standard” sized rails, we offer Jumbo rails that are more beefier and average 12”+ in circumference.  Jumbo cedar split rails are available in 10’ lengths.  The standard cedar split rails are generally about 10” in circumference. They are available in 8’ or 10′ lengths.

Two hole split rail western red cedar fence

Out of all fencing types, Western Red Cedar split rail fencing is one of the easiest to install, making it a good project for homeowners.  Once the posts have been set, the ends of the rails slip easily in place.

How to install Western Red Cedar Split Rail Fencing

  1. Practice due diligence to ensure where you are planning to place your Western Red Cedar split rail fence is on your property and does not interfere with boundaries, underground utilities, or your neighbor’s property.
  1. Contact your local building department to discuss your local building codes and permitting requirements for your proposed new fence.
  1. Since the rails are pre-cut, layout the fence with those lengths in mind, however, since it is likely to not layout perfectly, consider either shortening the overall length of your fence or shortening the fence rails to create shorter sections at each end by cutting the rails and trimming the ends to fit into the pre-drilled holes on the post.
  1. Stake out your fence line and determine where each post will be placed by using the same measurement as your rails. The post’s center will be placed either 8’ or 10’ apart based on the length of rail you have chosen.
  1. Lay out the posts and rails along your line to ensure a correct fit before you begin digging holes. Adjust as necessary.  This can save time later on.  And a lot of digging.
  1. We suggest using a posthole digger to ensure that you can secure each Western Red Cedar split rail post into the ground securely. When digging your holes, plan for a clearance of at least six inches from the ground to the lowest rail.  Adding a layer of gravel to the bottom of each hole can help with drainage, especially in wet climates.
  1. Place your end and/or corner posts first, ensuring they are plumb and straight, then backfill. Next, connect each post with a string line.  This will help your fence stay straight as you dig holes and place your other cedar split rail posts along the line.
  1. Staying along your string line, dig holes for each cedar split rail post, set each post, and insert the split rails into each post while checking each post for plumb and alignment.  Then, fill each hole with soil and tamp firmly.

Western Red Cedar Split rail fencing for sale

Before your next project, be sure to visit us!

www.CedarCountryLumber.com

950 B Fountain Street, Burlington WA

360.757.6343

DYI Tips for Installing Western Red Cedar Tongue and Groove Paneling

Western Red Cedar has been a prized building material for thousands of years due to its versatility, longevity, and natural beauty.   In more recent years, it has been identified and praised for its use in “green building”.  All-natural wood products, including Western Red Cedar, have been shown to have the least impact on the environment through their life cycle. Western Red Cedar building materials require less energy to produce than man-made alternatives, biodegradable, and completely renewable and sustainable.

For interior, as well as exterior use, Western Red Cedar tongue and groove (T&G) paneling can be installed vertically, horizontally, or diagonally.  It is commonly used as an exterior siding and cladding, in soffits and for ceilings, and either interior or exterior accent walls or paneling.

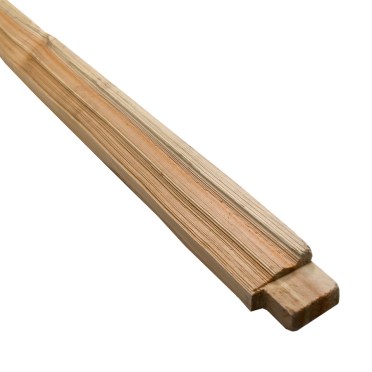
In clear grades, Western Red Cedar T&G is commonly supplied in thicknesses of 7/16” or 1” in either 4 or 6” widths, while knotty T&G is commonly supplied in 1” thickness in either 4, 6, or 8” widths.   Either are available in a variety of profiles.

The various grades and thicknesses of T&G are designed for specific appearances and uses.  Our sales team is happy to discuss these with you to ensure you receive the correct product for your intended use.  Upon receipt of your Cedar T&G, it should be inspected to ensure it is the correct product that you and your salesperson discussed and that it is not damaged or visually unacceptable in any way before beginning installation.   Please note, however, since Western Red Cedar is a natural material, color variations, as well as some defects, are allowable within each chosen grade.

Be sure to choose a fastener with a high level of corrosion resistance recommended for use with Western Red Cedar.   Should your Cedar T&G be installed near salt water or in another area with high condensation, a severe level of corrosion-resistant fastener should be selected.   We recommend using stainless steel ring shank nails in the appropriate grade for where the product is to be installed. The nails used need to penetrate at least 1 ¼” solid wood.   Plywood, sheetrock and/or particleboard, or similar sheeting is NOT considered solid wood.

HORIZONTAL or DIAGONAL INSTALLATION:  Start at the bottom and work up with the groove edges facing downwards and the tongues up.  Cedar T&G up to 6” wide can be “blind nailed” through the tongue at an approximate 45-degree angle with one nail into each framing member.  Should the framing be covered by sheetrock, plywood, or house wrap, before beginning installation, snap a chalklike or mark a line over the covering to ensure you nail at least 1-1/4” into the framing each and every time during installation.   T&G wider than 6” and those starter pieces and ending pieces will need to be nailed to the framing through the face.  As you move up the wall, be sure to tap each piece into place with a rubber mallet and check to be sure you are staying level.

Clear, Mixed Grain Western Red Cedar Tongue and Groove Paneling Exterior Accent Wall

We supplied the Clear, Mixed Grain Western Red Cedar Tongue and Groove Paneling for this stunning accent wall of the newly constructed Craft Stove in Mount Vernon, WA.

VERTICAL INSTALLATION:  Since framing generally runs up and down, you will need to provide “nailers”, horizontal blocking lines, or furring strips for the T&G to be installed properly.  Each piece of Cedar T&G will need to be secured to solid wood with at least a 1-1/4” penetration approximately every 12”.   Once the nailers are in place, use a level or plumb line to ensure the first board is installed plumb.  As with horizontal installation, pieces up to 6 inches in width can be blind nailed.  Wider pieces, as well as those in the beginning and the end, will need to be nailed directly through the face of the T&G into the solid wood behind.  Lightly tap each piece into to place and be sure to you are staying plumb throughout your installation.

Knotty Western Red Cedar Tongue and Groove Siding Cladding installed vertically

We supplied the knotty Western Red Cedar T&G that was installed vertically on this cute little cabin on Guemes Island, WA.

Should you have more questions or concerns about how to install your Western Red Cedar Tongue and Groove paneling, please do not hesitate to discuss this with your salesperson before installation of your product to ensure your Cedar T&G will perform at its best for you.

Before your next project, be sure to visit us!

www.CedarCountryLumber.com

360.757.6343

950 B Fountain Street, Burlington WA

Teepee Inspired Wedding Backdrop

A simple, yet beautiful, naked teepee makes a unique backdrop for a rustic country garden wedding.  Because it is easy to work with and light in weight, Western Red Cedar is ideal for constructing one.

Materials List

  • 6 ea 16′ 2×2″ Western Red Cedar
  • 1 ea 8 – 12″ Bungee Cord
  • 6 ea 6″ 60d Galvanized Nails
  • Tulle or Decorative Ribbon
  • Flowers and Greenery
  • Small bungee cords or florist tape to secure flowers

Tools Needed

  • Tape Measure
  • Cordless Drill
  • 1/2″ Drill Bit
  • Hammer

Measure down from each 2×2 about 18″ and drill a 1/2″ hole through the board.  Feed the bungee cording through the holes and secure using a good knot.

how to make a naked teepee for wedding backdrop

Next, drill an angled hole about 2″ up the other end of each 2×2.  These will be used to drive the 6″ nails through to secure the structure to the ground.

how to make a flower teepee for backdrop

Carefully wrap decorative tulle or ribbon around the bungee cord to cover.  Lift and place each 2×2 “leg” in a circular pattern.  Secure each leg with one of the 6″ nails.

metal stakes secure the 2x2 western red cedar tee pee to the ground

Now you’re ready to add flowers, greenery, and/or ribbons to decorate.  Using small bungee cords or florist tape works well.

rustic garden wedding backdrop teepee

flower tee pee how to

Congratulations to the new bride and groom!

Before your next project, be sure to visit us!  We ship nationwide!

http://www.CedarCountryLumber.com

360.757.6343

950 B Fountain Street, Burlington WA  98233

Western Red Cedar Decking – Goodman Project

Prized for its timeless beauty and work-ability, Western Red Cedar is a perfect choice for decking by homeowners and contractors alike.

Naturally resistant to rot and decay, good quality Western Red Cedar decking will perform admirably in our damp Pacific Northwest climate for many years to come.  Milled beautifully, it lies flat and stays straight; and because it is soft, no pre-drilling or special tools are required for installation.

We offer Western Red Cedar decking in a variety of widths and thicknesses, as well as grades. With all of this, it is easy to see why it is readily chosen over more expensive hardwoods and manufactured decking.

To help you design and build your dream deck using Western Red Cedar, the maximum spans for the various sizes on a continuous beam are as follows:

Thickness xWidth       Grade                     Span

5/4              4                    Clear                           16”

5/4              4                   Knotty                          12”

5/4              6                   Clear or Knotty           16”

2                 4                  Clear or Knotty            24”

2                6                   Clear or Knotty            24”

To help you figure the correct amount of decking needed for your project, use the following footage calculations to cover 100 square feet:

Size                                        Linear Feet

5/4×4  or  2×4                        325

5/4×6  or  2×6                        211

For other tips on designing your dream deck and installing your Western Red Cedar decking, please visit our blog posts on those subjects by clicking

HERE for Design

HERE for Installation 

Always be sure to check your local building codes for spans, clearances, and railing requirements in your neighborhood.

Please enjoy these fantastic project photos of the Goodman deck using our top quality Western Red Cedar.  5/4×6″ knotty decking was used for the deck top.

5/4x6" Knotty Western Red Cedar Decking

Top Quality Western Red Cedar Decking will perform well for many years

Knotty Red Cedar Decking

Western Red Cedar Deck with Hog panel railing

cedar railing with welded wire "hog panel"

Nick Goodman recently left this review on our Facebook page regarding this project.
I want to thank you for all of your guidance and help in choosing not only the wood but also the method of hog wire railing installation. You guys have great prices, wonderful customer service, and I couldn’t be happier with the outcome. Thanks again.”

We provide delivery in our local area, as well as the San Juan Islands, Skagit, Whatcom, Island, Snohomish County, and beyond!  Outside our area, shipment is arranged via common carrier.

With shipments leaving our warehouse daily, our customers know they can count on the quality of our products, backed by excellent customer service and superior product knowledge.

Before your next project, be sure to visit us!

CedarCountryLumber.com

1.360.757.6343

950 B Fountain Street, Burlington WA

Western Red Cedar Table Arbor ~ DIY

Perfect for small spaces when a massive Cedar Pergola would be overwhelming, or as in this case, to add lighting above an outdoor picnic table, this Western Red Cedar Table Arbor is a great DIY project.  Easy to assemble, and not a lot of special tools are required.

We used a 5’ Western Red Cedar picnic table we already own and made the table arbor appropriate for its size.  We modified the existing table by cutting 4” openings in the tabletop just outside where the table legs are to allow the table arbor to be secured to the picnic table legs, rather than the tabletop for more security and stability.

Material List

  • 2 ea 6’ 4×4” Appearance Cedar Posts
  • 4 ea 4’ 2×6” Knotty Cedar Boards
  • 4 ea 6’ 2×4” Knotty Cedar Boards
  • 8 ea 4’ 2×2” Clear Cedar Boards
  • 16 ea 6” Timberloc Screws
  • 8 ea 4” Timberloc Screws
  • 36 ea 3” Stainless Steel Screws

Tools Needed

  • Tape Measure
  • Cordless Drill & Bits
  • Chop (or Skill) Saw
  • Level

After the openings are cut through the tabletop of the picnic table, we squared the ends up on the 4×4’s, leaving one end on each flat (for the top of the table arbor) and angled the other end on each to add interest.  We attached the first post to an existing table leg using four of the 6” Timberloc screws about a foot down onto the table leg.   To ensure the two posts will be even in height, before securing the second one, use the level to determine the second post’s correct placement.  Attach with four 6” Timberloc screws.

For ease of construction, the next portion of the frame is built on the tabletop around the 4×4’s but not secured to the 4×4’s.  We evened up the ends and angle cut the 2×6’s and placed them on either side of the 4×4 post, then laid out the 2×4’s with even spacing and secured the 2×4’s (after we cut the angles on the end) on top of them using 6” Timberloc screws through the 2×4’s into the 2×6’s.  Once the frame is assembled, around the 4×4’s, lift it up and secure it to the top of the 4×4’s.  Be sure to use the level to check the height on each end before securing each 2×6 to the 4×4’s with two 4” Timberloc screws on each side of the 4×4.  Each post will have a total of four 4″ Timberloc screws in it to secure the frame to the top.

Next, we squared up the ends of the 2×2’s and cut each into the desired angle, spaced them evenly on top of the 2×4’s.  We used 3” Stainless Steel screws to secure the 2×2’s onto the 2×4’s.  (p.s. cats are not very helpful for this portion of the job)

how to build a table top arbor out of western red cedar

Solar-powered garden lights (3 sets) were secured to the table arbor using stainless steel staples.  This will add lighting to the table after the sun goes down.  (cats are not very helpful with this portion of the project, either)

Attaching solar string lights to a Western Red Cedar Picnic Table Arbor

How to build a table top arbor over a picnic table

The finished product ready for the next party!

To learn more about using the correct fasteners for this project and your other Western Red Cedar outdoor projects, please find more information by reading our blog post on this subject by clicking HERE.  

Western Red Cedar table top arbor

Before your next project, be sure to visit us!  We ship nationwide!

www.CedarCountryLumber.com

1.360.757.6343

950 B Fountain Street, Burlington, WA

Tips for Re-finishing Your Western Red Cedar

For the best results, thoroughly inspect your Western Red Cedar siding, trim, and/or decking first for any damage, mildew, and dirt.  Make any necessary repairs, then clean the Cedar with warm water and phosphate-free soap.  If necessary, a stiff bristle (non-metallic) brush can be used.  If there is mold or mildew (brown or black spots), it needs to be killed with a commercially available mildew killer/cleaner or warm water and oxygen bleach.  Should water staining be evident, scrubbing the wood with an oxalic acid solution can be effective for removal.

Western Red Cedar Siding Cleaning Tips

If there is old paint or solid color stain that is peeling and cracking, you will likely need to remove the old finish before removing any mold or mildew.  First, scrape away all loose, cracked, or peeling finish.  In severe cases, all the old products must be removed and must be done with extreme care not to damage the wood underneath.  Should old paint or solid color stains not require full removal, you can feather the edges of the product to the bare wood that has mold or mildew on it by careful sanding.   Clean it thoroughly, rinse with clean water, and dry completely.

A pressure washer may be used for cleaning your Western Red Cedar; however, great care should be taken. Use a low setting so that the grain is not raised or damaged is caused to the wood.

If your Wester Red Cedar lumber has greyed and you would like to restore it back to its original color, that can be done fairly easily using commercially available wood brighteners following the manufacturer’s directions after you have sanded the exposed surface of the Cedar.

After you are certain your Cedar is completely dry after it is cleaned, it is time to refinish.  When choosing a refinishing product, it should be the same type as the original finish.  Old latex should be replaced with latex, and old oil-based finishes should be replaced with new oil-based finishes, with the exception of latex being able to be put on top of old oil-based finishes.  Always follow the manufacturer’s directions no matter which product you choose, and make sure that it is specifically formulated to help control extractive bleeding and is approved for use on Western Red Cedar.

how to prep to stain western red cedar

Caution:  Film-forming finishes such as lacquer, shellac, urethane, and varnish are NOT recommended for use on Western Red Cedar in exterior applications and should be removed with great care.

Before your next project, be sure to visit us!

We ship nationwide!

www.CedarCountryLumber.com

(360) 757.6343

How to Style a Front Porch

-by Kym Kelly

As we come and go in our busy daily lives, we often stop seeing our surroundings through other’s eyes. A neglected front porch that accumulates miscellaneous odds and ends may not seem like a big deal, but to a new visitor or potential buyer, it can be a real turn-off. Even on a budget, some small touches, such as a good cleaning and a fresh coat of paint on the front door, can really boost the first impression. And, with the addition of a few furnishings, your porch can add real value, creating a welcoming transitional space between the outdoors and indoors.

How to style a front porch

Even a small porch can be made to feel welcoming by updating the light fixture, adding a fun little sign, and a well-placed chair, as seen in this picture.

After a good freshening up, consider your porch’s size and your home’s architectural details. You want to make sure people can easily access the steps and front door and not feel crowded with too much furniture or accessories. You will also want to create a style that compliments the exterior of the home and reflects the personality of the home’s interior.

For those lucky enough to have a big front porch, making it into additional usable living space can be challenging. For years, the porch at our house was left totally blank, other than a seasonal wreath on the door and a welcome mat. I had this idea in my head that it needed to be accessorized with beautiful rocking chairs, wicker love seats and tables, fantastic carpets, lush ferns, and gorgeous potted plants just like in the magazines. I wanted it all but wasn’t ready to pay the $2,000+ to create that style.  Finally, I began to look at items I already owned and scoured second-hand stores to find items in my budget that would turn my porch from a boring entry to a bonus living area for our home. Now, our front porch has become my favorite room, and I look forward to freshening it up each season by changing the plants and other accessories.

front porch

A customer of ours in Florida sent us this picture to let us know how amazing the
custom stained Western Red Cedar Shingles we provided look on her home (p.s. we love
customer photos!). I adore the sweet style she created on her porch with the vintage day bed and loads of pillows. She lives close to the ocean, so the simple addition of some “beachy” accessories completes this outdoor space perfectly. Note how the color palette of accessories complements the shingles, which we custom coated with a semi-transparent stain called Water Lily. So inviting!

Western Red Cedar Shingles

So, when you go home tonight, take a good, hard look at your entry and begin to think of items you already own that you might be able to add to bring a little personality and style to your front porch. Scour garage sales or thrift stores for a fun piece of furniture, and maybe add a fresh coat of paint to the piece to bring additional color to your porch. Next, add some softness with pillows, candles (I buy the inexpensive ones at the Dollar Store), seasonal flowers, and accessories.

A well-styled porch welcomes you home every day!

Before your next project, be sure to visit us! We ship nationwide ~ Specializing in Premium Forest Products in Western Red Cedar, Alaskan Yellow Cedar, Douglas Fir, and other exotic and domestic hard and softwoods.

www.CedarCountryLumber.com

950 B Fountain Street, Burlington, WA

360.757.6343

Cedar Roof Top Deck

Sometimes, thinking outside “the box” can have great rewards! Our customer recently completed this beautiful rooftop deck to enjoy our upcoming beautiful Pacific Northwest evenings. When the weather cools and the “rainy season” begins, the Western Red Cedar deck panels can be removed and stored. Because it is light in weight and naturally resistant to rot and decay, Western Red Cedar is the perfect choice for this type of application.

5/4x4 Western Red Cedar Decking

Each decking panel was made using our 5/4×5” Knotty Western Red Cedar decking, a somewhat uncommon size that allows the look of a wider board but a little lighter on the pocketbook. This decking is Kiln Dried prior to final milling, making for a smoother finished deck board.  Beautiful and affordable!

To make each of the removable deck top panels, the 5/4×5″ radius-edged Western Red Cedar decking was screwed to 2×4” Cedar runners cut to the appropriate size for each of the rooftop panels.  The size of your panels will depend on your particular roof, all while taking into consideration how the panels will be moved and stored.  If you will be moving the panels up and downstairs by yourself, for ease of removal, smaller panels would work better than something that would be stored on the same level moved by two people.

To allow for expansion and contraction of the decking and allow rain and debris to fall through, allow adequate spacing between the deck boards.  We recommend at least a 1/4″ gap between boards.  When installing the Cedar deck boards to the runners, to prevent corrosion, we recommend using Stainless Steel or coated screws at least 2-1/2″ long for 5/4″ decking.

20140703_173620 (2)

For more information on planning and installing your decking, including a list of tools and other items needed; please visit our blog on Deck Installation by clicking HERE.  If you have other questions, our team of experts is happy to help.

Before your next project, be sure to visit us

950 B Fountain Street, Burlington, WA

360.757.6343

www.CedarCountryLumber.com

We ship nationwide!