One of the oldest types of fencing, split railing fencing made from high-quality Western Red Cedar, is a popular and economical choice for defining property lines and other outdoor spaces and adding rustic beauty to the landscape. Due to Western Red Cedar’s natural properties that resist rot and decay, as well as insect attack, Western Red Cedar split rail fences will last for many years with no maintenance.
Our Western Red Cedar split rail posts and rails are all individually split, peeled, and formed to expose the cedar’s natural color and grain. Our split rail posts are pre-drilled for use as an end, corner, or line with either two or three holes to accommodate the rails. Two rail posts will yield a fence with a finished height of roughly three feet, while the three rail post system provides a finished fence height of approximately four feet.
Split rail fencing end posts are drilled halfway through and are used as starting and stopping points in the fence. Line posts are drilled all the way through to support rails on either side, while corner posts are drilled halfway through on adjoining sides to create right angles.

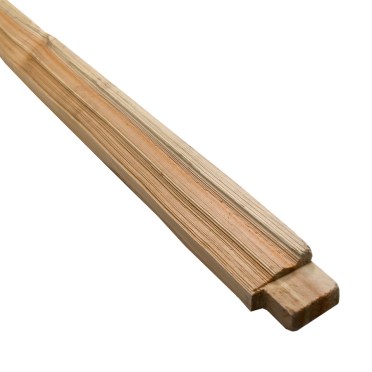
Cedar split rails can be used in conjunction with either the two rail or three rail system and have a tenon on each end to slide into the split rail post.
If needed, in addition to “standard” sized rails, we offer Jumbo rails that are more beefier and average 12”+ in circumference. Jumbo cedar split rails are available in 10’ lengths. The standard cedar split rails are generally about 10” in circumference. They are available in 8’ or 10′ lengths.

Out of all fencing types, Western Red Cedar split rail fencing is one of the easiest to install, making it a good project for homeowners. Once the posts have been set, the ends of the rails slip easily in place.
How to install Western Red Cedar Split Rail Fencing
- Practice due diligence to ensure where you are planning to place your Western Red Cedar split rail fence is on your property and does not interfere with boundaries, underground utilities, or your neighbor’s property.
- Contact your local building department to discuss your local building codes and permitting requirements for your proposed new fence.
- Since the rails are pre-cut, layout the fence with those lengths in mind, however, since it is likely to not layout perfectly, consider either shortening the overall length of your fence or shortening the fence rails to create shorter sections at each end by cutting the rails and trimming the ends to fit into the pre-drilled holes on the post.
- Stake out your fence line and determine where each post will be placed by using the same measurement as your rails. The post’s center will be placed either 8’ or 10’ apart based on the length of rail you have chosen.
- Lay out the posts and rails along your line to ensure a correct fit before you begin digging holes. Adjust as necessary. This can save time later on. And a lot of digging.
- We suggest using a posthole digger to ensure that you can secure each Western Red Cedar split rail post into the ground securely. When digging your holes, plan for a clearance of at least six inches from the ground to the lowest rail. Adding a layer of gravel to the bottom of each hole can help with drainage, especially in wet climates.
- Place your end and/or corner posts first, ensuring they are plumb and straight, then backfill. Next, connect each post with a string line. This will help your fence stay straight as you dig holes and place your other cedar split rail posts along the line.
- Staying along your string line, dig holes for each cedar split rail post, set each post, and insert the split rails into each post while checking each post for plumb and alignment. Then, fill each hole with soil and tamp firmly.

Before your next project, be sure to visit us!
950 B Fountain Street, Burlington WA
360.757.6343

